Showing posts with label Windows 7. Show all posts

Thursday, October 31, 2013

Spooler SubSystem App has encountered a problem and needs to close. We are sorry for the inconvenience


Spooler SubSystem App has encountered a problem and needs to close. We are sorry for the inconvenience
If you were in the middle of something, the information you were working on might be lost.
For more in formation about this error, click here.


Spooler subsystem app has encountered a problem and needs to close. we are sorry for the inconvenience--- SOLVED 100%................


What does this error message mean? That means the printer spooler services has stooped due to any printer driver malfunction or in the case you share a printer over LAN on Local Network. In most cases this problem arises, if you have a Local Network Printer, when you access the shared printer from the computer connected through LAN and open printers and faxes the message will appear and at that time you could not able to print any documents.


HOW TO SOLVE THIS PROBLEM?

Spooler SubSystem App has encountered a problem and needs to close. Solved..... 100%


If you have the problem on Local Printer (Local printer means where you directly attach the Printer to the Computer)

1) Uninstall the Printer Driver ( Device Manager --> Right Click on the Printer Driver ---> Click Uninstall) To access Device Manage on your PC (Start-->Run--> devmgmt.msc)

2) Restart the Computer

3) Connect the printer to the PC it will automatically install the driver for the printer

OR

1) Go to Printers and Faxes and Delete the printer you have 

2) Reboot the PC

3) Connect the printer to Computer

If the problem arises on a Shared Printer


1) Go to any computer on your Local Network on which you have installed a shared printer.

2) Then go to Printers and faxes

3) Delete the shared printer you have

In between if your printer spooler stooped working, then go to SERVICES.MSC and start Printer Spooler and delete the printer.

4) Reboot the Computer

5) Now install the printer on the computer by accessing the main computer where the local printer attached.


Shared printer Spooler Error on Windows XP Solved !!!!!

Now you will not get any error message on your computer regarding Spooler subsystem.


Freecomputertricks.in


To know How to share a printer over LAN - Windows XP Visit Here


Tuesday, August 27, 2013

How to Transfer Media Files, Download Videos, Manage Contacts, Backup and Restore Android Smartphone : All-in-one Android Phone Management Software for PC


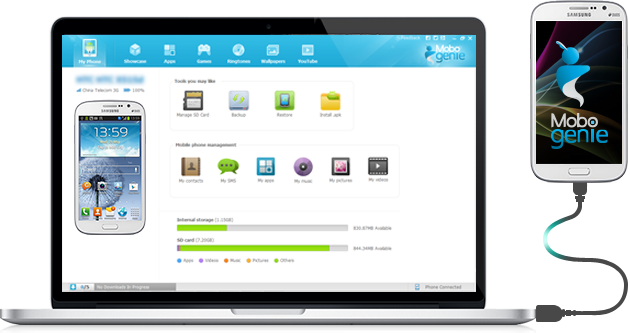
      If you have a Android mobile phone and want to transfer media files, Manage SMS, Backup and Restore, Download Application etc. then here is new Android phone Management software called 'Mobogenie'. Download Mobogenie and install it on your computer and connect your Android mobile phone and manage the phone from your computer.

Mobo Genie android phone management software for PC, All-in-one Android Smartphone Manager for Computer

      All Android OS and all brand Android phones is supported by the software, whether it's Samsung, Sony, LG, Micromax, LAVA etc. just connect your phone to PC, let the device driver to install, open the Mobogenie and use it to manage your phone.


      Mobogenie is the all-in-one Android smartphone management software for computer, if you are bother about how to transfer videos or other media files, manage contacts, backup your phone and restore, download and install android application etc. then this software will help you to do that, so download and install Mobogenie PC Manager for Android mobile phones.

     Mobogenie Android smartphone PC manager can simplify your Android phone with just one click, the software version 2.1.9 and released on 16th August, 2013. You can download the software from www.mobogenie.com.


Key Features of Mobogenie

  • Easy File Transfer
  • SMS Manager
  • Download videos, music and pictures
  • Backup & Restore contact list, texts, pictures, videos etc.
  • Manage Apps
  • Manage and edit contacts easily
  • Manage your Media files
  • Free Application Store to download 
  • 100% free Android phone manager

Download Mobogenie
 
Download mobogenie PC Manager Software for Android Smartphones

Saturday, August 24, 2013

How to change login screen in Windows 7 - Logon Screen Windows 7 Create/Set a Custom Background


This Tutorial will show you, how to customize the Windows 7 Logon screen background image without using any third party software. So to do this you need to make some changes in the Windows Registry and Group Policy, don't worry about that I will show you the step by step process to  change the background image of your Windows 7 Log-in screen.


Things to Remember

  • Windows Logo Key+R to Open 'Run' box, in the Run box
  • Type regedit and press Enter Key to Open Registry Editor 
  • Type gpedit.msc and press Enter Key to open Local Group Policy Editor


How to change the Log-In screen image on Windows 7

  • Go to registry editor (Windows Key+R and type regedit press Enter)

  • Navigate to HKEY_LOCAL_MACHINE\SOFTWARE\Microsoft\Windows\CurrentVersion\Authentication\LogonUI\Background

  • Double Click on OEMBackground and Change the Value data 0 to 1
Windows Registry Editor to change the login screen windows 7

If the key 'OEMBackground' not exist, right-click on the right pannel New-->DWORD Value with the name OEMBackground.
  • Go to C:\Windows\System32\oobe (if you have Windows in C: Drive or change the drive letter to your Windows installed drive).
  • Create a Folder with the Name info and create a backgrounds folder inside the info folder.
 
Create a backgrounds folder inside the info folder C:\Windows\System32\oobe to place your custom image for windows 7 log-on screen

Rename your wallpaper/image to backgroundDefault.jpg (the image file should be in .jpg format and less than 256 KB) and place it inside the backgrounds folder.
  • Now you have successfully set your custom background image for Windows 7 Log-on Screen, to check this Log-off, restart your PC or press Windows Key+L form the Keyboard and enjoy

Note: When you set a new theme for your Windows 7, the registry value may change to the default value. But you can prevent this by doing some setting in your 'Group Policy', lets have a look below process to change the Group Policy for the PC.


Group Policy Setting For Custom Login Background Windows 7

  • Open Group Policy (Windows Key+R type gpedit.msc and Press Enter)
  • Go to Computer Configuration\Administrative Templates\System\Logon
  • Find the “Always use custom login background” From the right-side panel,
 
Local Group Policy Editor to always use custom logon background Windows 7
  • Double Click on it
  • Click on Enabled then Click on OK button

Enable Always use custom logon background Windows 7 Group policy editor

So finally you have successfully changed your Windows 7 log-on screen by using Registry editor and Group policy editor and custom image.


Thursday, August 22, 2013

Nokia Lumia 720 PC Suite, Zune Software and Windows Phone App For Desktop | How to Download/Add/Sync/Transfer Songs, Videos, Photos, Ringtones to Nokia Lumia 720 Phone From Computer Windows/Mac


Microsoft Windows has two operating system for mobile phone, one is Windows Phone 7 and Windows Phone 8. Nokia Lumia series has the Windows phone operating system, the latest lumia series comes with the Windows Phone 8 operating system and older lumia series has the Windows Phone 7 OS. The Nokia Lumia 720 comes with the latest Windows Phone 8 OS.


Nokia Lumia 720, Sync Software for Windows and Mac, Transfer music and other media files to Nokia Lumia 720 from PC


If you want to sync photo, music, ringtone, video etc. to Lumia phone with your computer or if you have question that how you can transfer/download/add songs, videos to Nokia lumia phone from your computer then you have to install a software called Zune Software for Windows Phone 7 or Windows Phone app for Desktop for Windows Phone 8 on your computer or for the Nokia Lumia Phone having Windows phone 8 OS you can use Windows explorer/File explorer.


There are a number of different software/apps/tools available for sync your Nokia lumia phone with computer, the apps and tools can be different on the basis of what kind of computer you use i.e. Windows 8/7/Vista/XP or a MAC PC and which operating system your Nokia Lumia phone has whether it's Windows Phone 7/8 OS. So for Nokia lumia phone you may need either Zune Software, Windows Phone app for Desktop or Windows Phone app for Mac.

Nokia Lumia Sync Software For Windows Phone 7

For Windows

Zune Software is the only PC sync/PC suite software for Nokia Lumia Phone (Windows Phone 7 OS) to use for sync/add/download your photos,videos, musics and all of your media files. Zune software can be download from Windows Phone website or Click Here to go to the download page. Supported OS for Zune Software Windows XP SP3, Windows Vista, Windows 7 and Windows 8, It won't work on Windows RT.


For Mac 

To sync your media files from your Mac with Windows phone, you have to use 'Windows Phone app for Mac' which is available on Mac App store. The Windows phone connector/Windows Phone App for Mac can be used for synchronise video, music, photos etc. with your phone and also you can download phone updates.

So finally we got that, if you are using a Nokia Lumia Phone having the Windows Phone 7 operating system, then you need 'Zune Software' for Windows and For Mac you will use 'Windows Phone app for Mac' to sync files.

Nokia Lumia Sync Software For Windows Phone 8


For Windows

Windows 8 PC

If you are using Windows 8 PC, Use the Windows phone app or Windows Phone app for desktop or Windows Explorer/File Explorer.


Windows Phone app for Desktop, sync with your PC, Windows Phone 8 Sync Software for Desktop


Windows 7 PC

If you have Windows 7 PC and want sync your media files with Nokia Lumia phone, you can use the following options.


Windows Vista or XP PC

For Windows Vista or Windows XP PC, you have two options.


For Mac

Use Windows Phone app for Mac to sync media files.


Search Tags:

  • how to download songs to my nokia lumia 720
  • how to transfer music, video, pictures to my nokia lumia
  • how to sync media files with computer windows phone 7/8
  • how to download to nokia lumia mobile
  • how to add songs to my nokia lumia phone with windows phone 8 OS
  • how to sync videos and all other media files form computer to Nokia Lumia 720
  • nokia lumia 720 with windows phone 8 OS how to add songs
  • nokia lumia 720 PC suite software download
  • nokia lumia PC suite/Zune software/sync app for windows and mac
  • PC sync software for windows phone 8 for windows PC and Mac
  • how to sync contacts and others to my nokia lumia handset
  • how to add/transfer/sync songs,videos,mp3,photos etc on nokia lumia phone from computer


Wednesday, August 21, 2013

Download Windows 8 and Windows 7 Latest Software Free 2013 (Internet Explorer 10, VLC, Firefox, Google Chrome and Skype)


1) Download Internet Explorer 10.0 For Windows 7


Download Internet Explorer 10 for your Windows 7 Computer. Internet Explorer is the best popular web browser from Microsoft. It has the improved security, easy to use and faster internet browsing.


Internet Explorer 10 For Windows 7


You can Download Internet Explorer 10 offline installer from


2) Download VLC Media Player 2.0.8 For Windows 7 and Windows 8 (Windows XP SP2 or later).


VLC Media Player For Windows and Mac OS X


VLC media player is free player for Windows, which plays most multimedia files like DVD, VCD, Audio CD and it also supports various streaming protocols.


3) Download Firefox 23.0.1 For Windows 7 and Windows 8


Download Firefox 23.0.1 For Windows 8/7/Vista/Xp


Mozilla Firefox is also an popular browser for Windows, the latest version of Firefox has new features to provide a faster, more secure and customizable Web browsing experience for users.


4) Download Google Chrome 29.0.1547.57 Beta For Windows 8 and Windows 7/Vista/XP 


Google Chrome For Windows and Android


Google Chrome web browser for windows is also a popular and faster browser now a days. When you typing in the address bar it provides instant search results and also web pages. you can access Gmail offline using the Gmail Application on the Google Chrome.


5) Download Skype 6.7.0.102 For Windows 8/7


Download Skype For Windows Xp/Vista/7/8


Skype for Windows, with Skype you can make Skype to Skype free calls, video call on Skype and Facebook. To use Skype fro video calls you should have a webcam, headphone attached to the computer.


Thursday, July 18, 2013

It Is Better To Upgrade Immediately Your Windows XP For Security Reason


Windows XP users should upgrade soon For Security Reasons.

As you know Microsoft had released Windows XP OS in August 2001, but now the version of Windows XP is called the Windows XP Service Pack 3. For your information Microsoft is going to stop support services to Windows XP Operating System from April 8, 2014. That means Windows XP users will not get any security updates, whether it's free or paid. If your Windows XP computer will not have any patches and security updates then your computer might be at risks and it's easy to hack by the hackers.
Windows XP Service Pack 3
For this reason you should change your Windows XP Operating System to Latest one, the latest stable version of Windows is Windows 8 or you can also use Windows 7.

Tuesday, May 21, 2013

How To Download Torrent File Using IDM (Internet Download Manager)


Torrent is a P2P client, which is used to download .torrent files, with this you can download Movies, Software and many more things which is shared by your friends or anybody on the Internet. So generally we need a torrent client software to download those files, but downloading through torrent client is too slow. You will not get the full bandwidth of your Internet connection, for example if you have a 1Mbps broadband connection, you will not get the full speed of your bandwidth. So here is an other way thorough which you can download torrent file using IDM (Internet Download Manager) or any of your favorite download manager. 

To download torrent through IDM follow the steps below. Internet Download Manager or DAP normally gives a higher speed than torrent client.You do not need any extra software to be installed on your computer, just visit a web site "zbigz" and upload the torrent file and then you will get an http link which can be download by any download manager.

Steps to download torrent with IDM


1) You should have installed IDM (Internet Download Manager) on the computer or any of your favorite download manager


2) Visit the zbigz web site

ZbigZ To Download .torrent With Internet Download Manager

3) Click on "Upload .torrent file" and open your torrent file, which have downloaded before.

or

you can paste torrent or magnet link in the box, then click on GO!


4) You will be asked for Free and Premium, Click on Free


5) It will take some time to caching the torrent, after caching complete click on Download button


6) Again it will ask for Free or Premium Click on Free


That's all now your torrent will be download through IDM with high speed. You can download it through IDM or any download manager software you have been using. Downloading through download manager takes less time than torrent client, so keep downloading and enjoy !!!!!


Monday, April 15, 2013

Asus X55C-SX078D Laptop Price in India Rs. 21499/- : Asus Laptop Online Store Price in India at www.snapdeal.com


Asus X55C-SX078D Laptop Key Features:

  • Operating System: DOS
  • 500GB Hard Disk Capacity
  • 15.6" Screen
  • Intel HD Graphics
  • 2GB RAM
  • Pentium Dual Core-B980 Processor
  • Bluetooth v4
  • USB 3.0
  • Wi-Fi


Asus X55C-SX078D Laptop


Technical Specification of Asus X55C-SX078D Laptop:
 
GENERAL
Brand: Asus
Series: X55
Model Number: X55C-SX078D
Weight: 2.45 kg


PLATFORM
Architecture: 64 Bit
Operating System: DOS
Supporting OS: Windows 7 and Windows 8


STORAGE AND OPTICAL DRIVES
DVD RW Drive: Yes
Hard Disk: 500GB (5400 RPM)
Hard Disk Type: SATA


POWER & BATTERY
Battery Backup: Up to 3 hours
Power Supply: 65 W AC Adapter
Standard Battery: 6 cell


Asus X55C-SX078D Laptop


DISPLAY
Screen Size: 15.6 Inch
Screen Type: HD Glare Display


MEMORY
RAM: 2GB DDR3
Expandable Memory: Up-to 8 GB
Memory Slots: 2


PROCESSOR
Processor: 2nd Generation Intel Pentium Dual Core
Variant: B980
Clock Speed: 2.4 GHz
Cache Memory: 2 MB


GRAPHICS
Graphic Type: Intel HD Graphics


KEYBOARD/INPUT DEVICE
Integrated Camera: HD Web cam
Pointer Device: Smart Gesture Touch pad
Keyboard: Standard Keyboard


CONNECTIVITY
Ethernet: 10/100/1000 Base T
Wireless LAN: IEEE 802.11b/g/n
Bluetooth: v4.0


PORTS/SLOTS
USB Port: 1 x USB 2.0
USB 3.0: Yes
Mic In: Yes
LAN:Yes
HDMI Port: Yes
VGA Port: Yes
Card Slot: 2-in-1 Card Reader


Wednesday, January 30, 2013

CamStudio - Unable to execute file: C:\Program Files\CamStudio 2.6b\Recorder.exe


As we know that, Camstudio is a screen recording software for windows. With this software you can record your computer screen and audio form the microphone and save it in AVI format. It is 100% free for personal and commercial use. But after installing while you run the software some time you will get an error message like this:
Unable to execute file:
C:\Program Files\CamStudio 2.6b\Recorder.exe

CreateProcess Failed; code 14001.
This application has failed to start because the application configuration is  incorrect. Reinstalling the application may fix this problem.
Unable to execute file: C:\Program Files\Camstudio 2.6b\Recorder.exe
In this case, if reinstalling the application nothing will happen you will get same error message. So to solve this problem please follow the process below.

1) You might not have Microsoft Visual C++ 2008 SP1 so download and install Microsoft Visual C++ 2008 SP1 Redistributable Package (x86)


2) or you can try Camstudio 2.6c from 


Saturday, January 26, 2013

How To Turn Your Windows 7 Laptop Into Wi-Fi Hotspot - With Video Tutorial


Do you know? that you can use the windows 7 PC as a WiFi Hotspot. If you are searching for Wi-Fi hotspot and don't know how to do it, then here is the procedure through which you can easily turn your windows 7 PC into Wi-Fi Hotspot. For this you need a Wifi enabled Desktop, if you don't have wifi on your Desktop then you should purchase one and fix it to the PCI slot. If you are using Laptop, then not to worry all the laptop now a days come with Wi-Fi. You do not need any kind of software to do it, just do some settings and you will able to share your Windows 7 laptop's Internet with friends.

Requirements :
  • A Desktop/Laptop with Wifi having Windows 7 OS
  • Internet Connection on the PC (LAN or 3G Datacard)
For Example : Windows 7 Laptop having Internet (BSNL 3G Datacard) and want to share the Internet with others by turning it into a wifi hotspot. The procedure is as below.

1) Attach the BSNL 3G Data card to Laptop and finally connect it to get internet connection on the laptop (using the software given by BSNL in the Data card) or if you have broadband connection, just connect it to the LAN port. Now your Laptop has the Internet on it.

2) Go to Control Panel\Network and Internet\Network and Sharing Center and click on the Manage Wireless Networks from the left panel.

3) Click Add ---> Create an ad hoc network ---> Click Next

4) In the Network name, type any name on it ( here it's mypc1) and in the Security key enter abc12345 (for example) and Click Next. You can choose your Network name and Security key.
Wi-Fi Hotspot on the Windows 7 Laptop
5) Now Click on Turn on Internet connection sharing and you will get a message Internet connection sharing is enabled, Click Close.

You have successfully created the wifi hotsopt on the Laptop. On another laptop you will get Wireless Network Connection mypc1, Click Connect and give the key abc12345 and you will be connected to the laptop and can use the Internet now. This wireless network may not be access through some wifi enabled mobile phones.

Watch the Video to set up wifi hotspot on Laptop using Windows 7.

Tuesday, January 22, 2013

What is Windows ? - Computer Basic Tutorials


Windows is an Operating system. It provides an environment called graphical user interface (GUI). We have to interact the computer visually or graphically. With windows we have not remember the DOS commands and how to put it. You can do it by simply click on a picture or select command from the list, that you want to do.

The versions of Windows are 95, 98, 2000, XP, Windows Vista, Windows 7 and Recently released Windows 8 etc. 

How to start windows explorer ?

Start ----> Programs ------> Explorer (Up to Windows Xp)

Start -----> All programs ------>Accessories ----->Windows Explorer (Win 7)

Components of Windows :-

1) TITLE BAR ---->

Title bar display at the top of the windows. It also display the current application and file name that you use.

2) MENU BAR ---->

It display at the below of the title bar. These are the collection of options or commands.

3) TOOL BAR --->

The bar in which you find the tools. The tools are the pictorial form of the option of command.

Tool Tips --> When you move the mouse pointer to tool, it gives a message regarding the use of that tool is called tool tips.

4) STATUS BAR ---->

It display the size of a selected file or folder. This bar appear bellow of the window.


*DESKTOP---> The windows back ground screen or on which all the windows and icons appear is called Desktop.

*WINDOW---> The Rectangular portion on which you find; Tools,  Title, Menu bar etc, is called window.

*ICON---> The pictorial form of application or files or folders, which are placed on the Desktop or inside any Drive is called an Icon.

5) TASKBAR ---->

Task-bar normally appear at the bottom of the desktop. The most important button of the taskbar is Start. You use the start button to run a program each time. When you open a window the taskbar placed the window name on it.

Window Explorer - Windows 7 :-

Windows 7 Explorer

In windows 7  by default the menu bar is hidden to show the menu bar Click on Organize ---> Layout ---->Menu bar. Now the menu bar will appear on the window.

Windows Explorer with Menu Bar

In the menu bar you will find the File, Edit, View, Tools and Help Menus. Click on the View menu and click on the status bar, the status bar will appear at the end of the window.

Friday, January 18, 2013

All in One Driver Solution For Laptop and Desktop - DriverPack Solution


Are you searching for drivers to install on your Laptop or Desktop? Today's topic helps you to find the best solution of Driver problem. As you know it difficult to find a driver on the net or for driver you need to spend more time on the net. So here is a software called DriverPack Solution in this driver pack you will get almost all the drivers for Computer or Laptop.

The Driverpack Solution is all in one solution for Laptop and Desktop Drivers, it allow automated driver installation, the program Scans the hardware and installs all required drivers to any computer in just about few minutes. All drivers on a single DVD, If the driver is not available on the DVD you can download new drivers from the Internet on a single click on the link Provided by DriverPack solution. It also has Driver update capability which allow you to update the previously installed drivers on the computer to their latest versions. It supports Windows 8, Windows 7, Vista and XP both 64 bit and 32 bit versions. To download this software Search Google for DriverPack Solution you will get the site first on Google Search Result, go to that site and click on download you will find two variation one is DriverPack Solution 12.3 Lite and another is DriverPack Solution 12.3 Full.

DriverPack Solution
Driverpack Solution 12.3 Lite is a about 7MB software, it only scan the Computer hardware and offers you to download from the Internet but in the Driverpack Solution 12.3 Full you can install all the driver in offline mode and you have to download it via torrent, so to download torrent file you need to install torrent client on the computer like utorrent etc. 

 How to Install Drivers Using DriverPack Solution DVD ?
  • The driver pack will be downloaded in ISO DVD Image file, So burn a DVD using any CD/DVD burning software i.e Nero.
  • Put the DVD in to Drive and wait for few seconds to run it automatically or Go to My Computer and Right click on the CD/DVD Drive and click on auto run.

  • Wait for moment to scan the hardware of the computer and show the suitable driver for it.

  • Then Click on Expert Mode from the right panel of the window you will see the missing drivers just click one by one and Click on Install from the right panel. You can also see the 'Installed driver Updates Available' below the missing driver option.
Driver Solution Pack 12.3 Video Tutorial Here.

Monday, January 14, 2013

HP Pavilion dv9000 Not Wake Up From Sleep


         What this problem is ? Normally when your Laptop goes to sleep it will wake up if you press any key or power button but in this case you unable to do this. I have seen this problem on a HP pavilion dv9000 laptop, if you press the power button also nothing will happen and finally you have to remove the battery and put it again, then only the laptop will start. The problem is due to some fault in the mother board of the laptop. So to solve this problem you have take it to HP service center or you can disable the standby or sleep option. How to disable the sleep option on the laptop running Windows 7 is as below.

To change the power settings for sleep :
  • Right click on battery icon (task bar) then click on power options the power option window will open
  • Click on "Change when the computer sleeps" then on the 'put the computer to sleep' option set it to Never both for On Battery and Plugged In.
  • Now click on Save changes

Power Option on Windows 7
  • Again click on the "Change when the computer sleeps" then  click on change advanced power setting, click on the Hard disk (+ mark),
  • Click on Turn off hard disk after, you will find two option On battery and Plugged in or Power
  • Click on "On battery" and set it to '0', the number '0' means never, then do it for the plugged in option
  • Click apply and OK
  • Click back button or click cancel to come to the power option
  • Click on "Choose what closing the lid does"  and set 'When I press the sleep button' to 'Do nothing' both for battery and power
  • And 'When I close the lid' set it to 'Do nothing' both for battery and power
  • Click on Save changes and close the window
 Now your laptop never goes to sleep, it will only turn off the screen.

Thursday, August 30, 2012

CCleaner v3.22.1800


As we know that CCleaner is the system optimization, privacy and cleaning tool. It removes unused files from the system, allowing Windows to run faster and freeing up valuable hard disk space. It also cleans traces of your online activities such as your Internet history. Additionally it contains a fully featured registry cleaner. The best part of CCleaner is it's fast and normally taking less than a second to run. The updated version of CCleaner is v3.22.1800 and it provides Free, Professional and Business Edition.

CCleaner for Windows PC Small and best cleaner software

CCleaner Cleans the following :

Internet Explorer
Temporary files, history, cookies, super cookies, Auto-complete form history, index.dat files.

Firefox
Temporary files, history, cookies, super cookies, download history, form history.

Google Chrome
Temporary files, history, cookies, super cookies, download history, form history.


Opera
Temporary files, history, cookies, super cookies, download history.

Safari
Temporary files, history, cookies, super cookies, form history.

Other Supported Browsers
K-Meleon, Rockmelt, Flock, Google Chrome Canary, Chromium, SeaMonkey, Chrome Plus, SRWare Iron, Pale Moon, Phoenix, Netscape Navigator, Avant and Maxthon.

Windows
Recycle Bin, Recent Documents, Temporary files, Log files, Clipboard, DNS Cache, Error Reporting, Memory Dumps, Jump Lists.

Registry Cleaner
Advanced features to remove unused and old entries, including File Extensions, ActiveX Controls, ClassIDs, ProgIDs, Uninstallers, Shared DLLs, Fonts, Help Files, Application Paths, Icons, Invalid Shortcuts and etc...

Third-party applications
Removes temp files and recent file lists (MRUs) from many apps including Windows Media Player, eMule, Google Toolbar, Microsoft Office, Nero, Adobe Acrobat, WinRAR, WinAce, WinZip and many etc...  

System Requirements:

Windows 7, Vista, XP and 2000. Including both 32-bit and 64-bit versions

📚 You May Also Like to Read