Windows/Android & AI Tutorials, Tips, Tricks & Tech News

Search This Blog

Powered by Blogger.

Wednesday, November 30, 2016

Mi Store Shows Chinese Language - Solved


Xiaomi Redmi Mi Smart Phones after flashing shows Chinese language on the Mi store and some of the other application, how to solve this problem on Redmi MI phones. Here is the tutorial for those who face the problem of Chinese language or want to change Mi store language to English, then this topic will help you regarding that. If you are OTA update ROM then you will not face any kind of problem, but sometimes this problem comes when you flash the phone using some fastboot ROMs. See the below solution to solve the Chinese language showing in MI Store, applicable for all Xiaomi Redmi Mi phones.

Mi Store Chinese Language Problem

FAQ?

1) After flash Redmi Mi 3s it shows Chinese language in Mi Store and some other application.
2) I changed the language to English in "Language & Inputs" but shows Chinese language in Mi Store.
3) After flash Xiaomi Redmi Mi Smart Phones it not showing "Play Store" app, what to do.
4) Some application shows Chinese language in Redmi Mi Note 3
5) How to change the Mi store Language Chinese to English India
6) In Mi phone already set the language to English but shows Chinese Language.
7) Xiaomi Redmi Mi Smart Phone Language Problem
8) How to solve the Chinese Language Problem on Mi Note 3S
9) MIUI shows Chinese Language
10) MIUI 6 showing Chinese Language in Mi Store and other applications
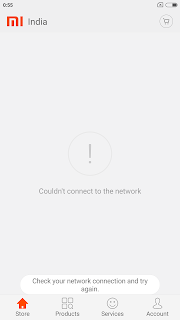
Mi Store English Language

Redmi Mi Chinese Language Solution:

This problem happens, when you flash the phone using any fastboot custom ROMs or any non global ROMs. So to solve the Chinese language problem in Mi phones please flash the phone using any Global ROM according to phones model, for example if the phones model number is Redmi 3S Prime (2016032) then download and use this Global ROM Image file below
land_global_images_V7.5.8.0.MALMIDE_20160712.0000.26_6.0_global

Sunday, November 27, 2016

Micromax Q400 FRP Unlock Solution - Solved


How to hard reset the Micromax Q400 and FRP Unlock/bypass Gmail account on Q400? The below is the details process to Hard Reset and FRP Unlock on Micromax Q400 Android smartphone. Here is direct link to download Micromax Q400 Flash Tool, FRP Tool and Q400 stock firmware. If you have Miracle box with key then it's easy to remove FRP on Micromax Q400.

Q400 FRP Reset OK

Micromax Q400 FRP Using Miracle Box:
1. Switch on the phone connect PC
2. Install the Driver
3. Open Miracle Software 
4. Select Motorola FRP Reset
5. Click on Start 

That's all now you have successfully do the FRP reset on the Micromax Canvas Blaze 4G Q400.

Downloads:

1. Micromax Q400 USB Driver Here
2. Micromax Q400 Flash Tool Here
3. ADB Tool Here

Micromax Q400 FRP Reset Without Any Box/Flash Tool

1. Download ADB Tool and extract it on the Desktop
2. Put the phone into Fastboot mode by Pressing Vol - key and power key then connect the handset to PC
3. Open MAF32.exe in the ADB Tool Folder
4. Now execute the below Command one by one

Commands:
==> fastboot oem unlock press enter key
==> fastboot -i 0x2a96 erase config press enter key
==> fastboot -i 0x2a96 reboot press enter Key

Then after reboot google Id will be rest

Thursday, November 24, 2016

Samsung J2 2016 (J210E) FRP Unlock Solution


In this topic we will show, how to FRP unlock or bypass FRP of Samsung J2 2016 Android Version 6.0.1 new security. If you forgot the Gmail account user id and password then this process will help you to recover your device using new Gmail id and password. This is a long process but don't worry, just have patience and follow the steps carefully.

Downloads:
  • Android_6_Google_Account_Manager.apk Here
  • com.rootjunky.frpbypass-1.0.apk Here
Both can be download here

Requirements:
  • First download the above two Android apps
  • Now Copy these files to a pen drive and a OTG Cable
  • 2 SIM Cards with PIN Lock
J2 2016 FRP Lock Reset OK

How to FRP Reset Samsung J2 2016 ?
  • Switch on the phone and connect to WiFi then switch off the phone
  • Put 2 SIM cards (With PIN Lock) and switch on the phone again
  • Now it will ask Unlock SIM
  • Enter the SIM 1 PIN Number and Press OK and wait until it shows signal (Only SIM 1 PIN)
  • Select Emergency Call and touch the Emergency Call icon (Down Left Corner) you return to the Lock screen don't worry just do it again and now you also come back to the lock screen
  • Now just put the second SIM PIN Number and press OK
  • In this step you will the SIM Card Manager on the phone, Press DONE
  • Now you will see the Contacts
  • Now to call, just select any one contact and end the call suddenly and Immediately Click on Message Icon (Select your contact number) If you do not save any contacts in the SIM then you must do it before.
  • Now type a Message like this asdfg@mail.com and send
  • Now you will see the email id underline on the message
  • Click on the Email id and Click on Send email
  • It will ask to Open With, Select Email
  • Now it will ask to Add new account (here you should give the working Gmail id and password)
  • Enter the Email Address and click on password box then click on Next, now enter the password click on sign in, click on Allow and wait until the process complete
  • Now the email will open, click on ATTACH, select OTHER (Bottom right corner)
  • Now select My Files (Now your are here My Files > Device Storage)
  • Just touch the My Files (on the top left side) to go back to the storage option (do not use the down right soft key to go back)
  • Now put the pen drive using OTG cable and click on device storage and come back again by touching the My Files
  • Now open the USB Storage, First install the Android_6_Google_Account_Manager.apk, there will be no open option just click on Done and come back and install com.rootjunky.frpbypass-1.0.apk and open it
  • Now you will see Re-type password, here you just select the Browser sign in on the top right corner
  • Now enter the Gmail id and Password, after sing in compete just restart the phone
Now it will not ask any Gmail id and after switch on the phone reset the device using settings options.

Monday, November 21, 2016

How to Flash Intex Aqua T5 V0.5 With Smart Phone Flash Tool


Here is the process, how you can flash Intex aqua T5 Android smartphone using flash tool. If you normally flash the phone using smartphone flash tool, the flashing process will not complete or hang the preloader or stuck on 5% in the flashing process, so how you overcome this process is as below.

Intex Aqua T5 Flashing OK SP Flash Tool
Today I try to flash this Intex Aqua T5 smartphone using sp flash tool with the normal process as we do to flash MTK base smartphones using smartphone flash tool. i.e. Select the scatter file and click on download or sometimes we uncheck the preloader and then try to flash, but here in this phone I try both the process to flash the phone, but it stuck in 5% with some error message. Finally I got a solution for this problem and share it here.

Downloads:
Intex Aqua T5 V0.5 Firmware Here
 
How to flash Intex Aqua T5?
  • Download the above firmware for Aqua T5
  • Now Open flash tool and select scatter file
  • Select Download Only
  • Now select one by one image file and click Download

For Example first select USRDATA (only select this) then click on download and connect the switched off phone to the PC, then select ANDROID click on download. Download one by one using this process and leave the PRELOADER and try to switch on the phone if the phone not switching on then again flash PRELOADER only.

That's all now you are successfully flash the Intex Aqua T5 using smartphone flash tool.

Thursday, November 17, 2016

Lenovo A6000 and A6000 Plus All Version OTA Update Download


If you are searching for Lenovo A6000-s or A6000 Plus firmware to download and how to flash Lenovo A6000+, then this will help you regarding that. Here is the example of SD Card OTA Update files and can be flash using Memory card with the help of Recovery Mode of the Android Smart Phones.

Lenovo A6000 and A6000 Plus Firmware Downloads

There are two variant of the Lenovo A6000 series, which confused the mobile technician to find out, one is Lenovo A6000 which has 8GB ROM and 1GB RAM and another one is Lenovo A6000 Plus, which has 16GB ROM and 2GB RAM, see the below details.

Lenovo A6000:
Lenovo A6000 which has Android OS v4.4.4 (KitKat), Qualcomm Chipset MSM8916 Snapdragon 410, Quad-core 1.2 GHz Cortex-A53 CPU and 8 GB ROM and 1 GB RAM.

Lenovo A6000 Plus:
Lenovo A6000 Plus which has Android OS v4.4.4 Kitkar and can be upgrade to v5.0.2  Lollipop, Qualcomm Chipset MSM8916 Snapdragon 410, Quad-core 1.2 GHz Cortex-A53 CPU and 16 GB ROM and 2 GB RAM.

Lenovo A6000 Firmware Download:

1) Lenovo A6000 Plus Stock Firmware
  • Android 4.4.4- Kraft-A6000-s_S015_150819_WCC8
  • Android 5.0.2- Kraft-A6000-s_S030_151030_WCAF
  • A6000-s_S028_150827_WCBC

2) Lenovo A6000 Stock Firmware
  • Kraft-A6000_S032_150327_WCDB
  • Kraft-A6000_S056_150924_WC8B
  • Lenovo_A6000_S037_150605_8G_ROW
Please download the text file attached here and get the direct download link of Lenovo A6000 and A6000 Plus firmware to flash the phone.

Download Firmware Link Here

Wednesday, November 16, 2016

Redmi Note 3 Pro (2015116) Hard Reset and Flashing Procedure


How to hard reset the Xiaomi Redmi Note 3 Pro (Model Name - 2015116)? Here is the details procedure to flash the phone using Mi Flash Tool and the hard reset process. As you know when you try to flash using Fastboot Mode or ADB Mode with Mi flash tool you will not success and gets some error messages.

When you are going to do a hard reset of Redmi Note3 Pro using keys, it will not success, means you will not able to see the recovery mode as it may disabled by the manufacturer or there may be some trick behind it, so it's difficult to get the recovery mode on Xiaomi Redmi Note3 Pro. If there is no recovery mode then how you can do a hard reset in the case of Software problem, like Mi Note 3 Pro hangs, not working properly and stuck on Mi Logo etc. Do not worry there is a way, you can flash the phone using Mi Flash Tool.

Xiaomi Flashing Problems:
The Xiaomi Redmi Note 3 Pro flash failed with fastboot mode
Xiaomi Redmi Note 3 Pro no recovery mode
Mi note 3 pro flash failed in fastboot mode
Redmi Note 3 Pro Boot loader unlock
Bootloader locked mi note 3 pro 2015115
Note 3 Pro EDL Mode

Redmi Note 3 Pro EDL Mode Success
How to Boot into EDL Mode Mi Note 3 Pro (2015116)

  • Put the phone into fastboot mode
  • Connect it to the PC and let the driver installed
  • Now download this fastboot tool .... Here
  • Run the Tool and Type Number 4 to Enter EDL Mode and Hit Enter 
  • Now the phone will reboot into EDL Mode
  • Let the PC install the drivers if not found the driver install it

Tools & Downloads:

Check the Qualcomm Driver in Device Manager (For Example See Below)

Qualcomm HS-USB QDLoader 9008 Driver
Now flash the downloaded note 3 pro ROM using Mi flash tool Beta.

How to Downgrade Samsung J7 From 6.0.1 to 5.1.1 : Samsung J7 (J700F) Only


As you know, when you try to flash or write firmware on Samsung J7 (J700F) using Odin3 or any other flash tool, you get an error message and the flashing process is failed. I tried several firmware to flash the J7 but not success and search the Internet for this and get a firmware that can flash the Samsung J7 and also downgrade the J700F from Android Version 6.0.1 to 5.1.1.

Samsung J7 (J700F) Flash Success Using ODIN 3
 So here is the details to get the firmware and download J700F firmware, flash it using Odin Flash Tool and  downgrade 6.0.1 to 5.1.1. After downgrade the Android version you can easily do a FRP reset of the phone.

Downloads J700F:

1) J700F_PC4_PC8_PG3_Build_Downgrade_By_CHAIN.tar download using Google Search.

2) Download Odin3 V3.12.3 

DOWNLOAD ODIN3 V3.12.3

Tuesday, November 15, 2016

Fastboot Hard Reset and FRP Tools Download Free


If you are searching for hard reset tool and FRP (Factory Reset Protection) Tools, then this topic will help you to find the tools and download these tools and use these tools to remove FRP and to hard reset the Android base smartphones.

Here is some tools which gives better result on hard reset and FRP lock without using any hardware flash boxes. So download these hard reset and FRP removing tools and use it on Fastboot mode.

Fastboot Hard Reset and FRP Tools:

Download Fastboot FRP and Hard Reset Tools
Download the Flash Tools below 4shared Link


Saturday, November 12, 2016

How to Flash/Unlock Redmi 3S Prime 2016032


Here is the topic about how you can flash the Redmi 3S Prime? So the brief details is given below, that how you can flash the Xiaomi Redmi 3S Prime using Xiaomi Flash Tool. As we know the the phone has Qualcomm CPU, for which you need a Qualcomm flash tool to flash the Redmi 3S firmware or to unlock the phone.


Redmi 3S Prime 2016032  Flash OK

How to flash Redmi 3S Prime 2016032?

Download:
1) You need to download MiFlashSetup-Beta.zip
2) The firmware according to the phone version

Process to flash:

  • Install the Mi flash tool beta setup
  • Unzip the downloaded firmware and put it on Desktop
  • Now open Mi flash tool and select the firmware folder
  • Select Clean All and Lock on flash tool
  • Now hold the both volume and connect the phone to PC
  • Click on refresh to detect the phone on flash tool
  • Now click on flash and wait until the process is finished

That's all, now the phone has successfully flashed with Mi flash tool, so follow the tutorial about mobile flashing and enjoy.