Showing posts with label Mobile Tricks. Show all posts

Saturday, March 31, 2018

Get Jio Prime Membership Free For One Year Up to 2019


As all of us know, that Jio Prime membership will be end on 31st March,2018 to continue the service you need to recharge of Rs.99 to extend the Jio prime for next one year. But you may not know that Reliance Jio extended the Jio prime membership for one year, but another question may rise, that how you can get the free Jio prime membership for 1 year and here is the solution for it.

To avail this free service from Reliance Jio, you need to log in to your Jio account using "My Jio"  app, after login just see there is an option to request for free Jio prime membership for 1 year, click on that and then click on submit.
How to Get Jio Prime Membership Free For One Year Up to 31/03/2019

After confirmation of your free Jio prime membership, you may get an SMS regarding this on the Jio number. So all the Jio users enjoy the free service of Reliance Jio for 1 year.

Enjoy One Year of Reliance Jio Prime Benefits at no additional fee

The exciting offer from Reliance Jio is for all Jio customers, who have not done the prime recharge, If you are also not done the Jio prime recharge, then do not worry because Jio has extended the Prime membership to another one year, that means your Jio prime membership has been extended to one more year up to 31st March, 2019. Now you can get Jio prime membership free for one year up to 31st March, 2019.

How to Get Jio Prime Membership Free For One Year?
  • Login to your Jio account using My Jio App.
  • After login just see to the top right side inside the app.
  • Then click on Get free Jio prime for One Year.
  • Then request the same and Done.

Friday, September 16, 2016

Nokia 5130 Motherboard Full Short Solution - Free Computer Tricks


Here is the topic about Nokia 5130 Mobile phone, how to remove short on the Nokia 5130 PCB or board. and here is the tutorial how to repair Nokia 5130 it it's short. If you are a mobile technician then you may know how to check whether the Mobile motherboard is short or not. 

Due to Mobile motherboard short you may face the following problems:
  • Mobile not switched on
  • Battery getting heat
  • Mobile is in Dead condition
So here is the solution for short problem on Mobile Motherboard, for example Nokia 5130, see the below image to solve the short problem. Just remove the capacitor near battery connector.

Nokia 5130 Full Short Solution Done
Remove the capacitor as shown on the above image, now check the Nokia 5130 and it will switch on, before do that check with the multi meter to confirm, that the motherboard short is gone. 

Saturday, December 26, 2015

Huawei Honor Holly U19 - How to Read and Write Odia Language


How to read and write Odia/Oriya Language on Honor U19? here is the solution to install Regional language on Android 4.4 phone and here is the example of Honor U19 Android smartphone which does not support Odia language. So to install regional language on honor U19 Android Mobile you have to Root the device, install Font Installer Root App, so for this you should have knowledge about Rooting and System Path etc.. Otherwise don't do it.

Note- This topic is for tutorial purpose, if you are not aware of this process then do not try or try at your own risk.

Install Odia Language On Honor U19

  • Install Kingo Root on the phone and Root the phone
  • Now download Font Installer Root from Play Store
  • Download Odia Font and Install Using Font Installer

Download and Install Kingo Root from Internet Using Google Search, then open the app and click one click root and wait until the process finished, remember the phone should have data connection.

Honor U19 Root Success With Kingo Root
Now Install Font Installer Root From Google Play

Font Installer Root
Now Download Odia Font Here

Google Indic Keyboard To Write Odia Language on Android Smartphones

Extract the Zip file, Open Font Installer  and Install the Odia font then restart, that's all now you will able read Odia language on the phone to write Odia language just download Google Indic Keyboard from Play Store.

Sunday, December 6, 2015

Honor Hol-U19 Lcd Light Off During Call - Proximity Sensor Calibrate On Android Phones


If you have problem with Proximity Sensor Calibrate, then you face the problem LCD light off during Incoming call and while make outgoing call also, that means on incoming call you will not able see anything on screen only you can hear ringtone and to receive the call you must press the power key for light on screen then you can receive the call, same on outgoing call, while you make outgoing call the lcd screen will goes off. To solve this problem just follow the below solution.

So here is the tutorial how to calibrate Proximity Sensor on Android Smartphones, The above problem comes due to either sensor hardware or software problem, that means if the phone has hardware problem then you must change the proximity sensor, no setting will help on this but if you have some setting problem then you can easily overcome the problem.

Proximity Sensor Calibrate on Android Smartphones:

Here is the example of Honor Hol U19 phone

Steps:

  • Switch off the phone now press volume down + power for factory mode

Honor Hol-U19 Factory kit test or factory mode
  • Now Click on Item Test

Proximity Sensor Calibrate on Android
  • Now click on Proximity Sensor Calibrate
Calibrate Proximity Censor, While call display light goes off
  • Now put the phone on a plane surface and do not cover the phone P sensor Click on Calibrate 

Proximity calibration test pass
  • Now you will see Test Pass on the screen, that means the proximity sensor is calibrate successfully, now remove the battery and put it back and switch on the phone and check by making calls.
 

Monday, November 30, 2015

How to Type in Odia Language on Samsung Galaxy J7 - Odia Language Help On Android Device


Now many of the Android Smartphone support Regional language, so here is the tutorial how to enable this feature to write regional language for message or on the web. If the handset support to view the language you want to use then you can also write/type the language using settings, here is the example of Odia/Oriya Language, suppose you able to see the odia text someone sent to you then that means your mobile phone support odia language, so to write in odia you have to do some settings on the phone, the below is the details of settings for odia input or odia typing or odia language on Android Smartphones.

Odia Typing on Samsung J7

  • Go to Settings

Odia input on Samsung mobile go to settings
  • Then Language & Input

Click on Language and Input
  • Samsung Keyboard

Under Keyboard and input methods click on Samsung Keyboard
  • Select Input Language

Select input languages to add odia language for typing

  • Choose Input Languages

Choose the language you want add, here it's Odia
Now you have successfully add Odia language to the phone to type in Odia, for any other regional language you can follow the above process to add their regional language to the phone.

To type in odia open the typing and hold the space key and swipe left or right to change the language inputs. For example open message and type a new message, the keyboard will automatically now hold the space key and swipe left or right to write in odia Language and enjoy.


Tuesday, June 23, 2015

How to Deactivate Flash Message on Nokia Lumia Phones


Here is the topic about, how to deactivate flash message on Nokia Lumia phones. A flash message is a message that's come to the phone and flash on the screen in full scree mode with having a OK button, if you touch/select the OK button you will charge the price mention on that message.


So if you are receiving this type of messages, it can be disable/deactivate by using the following steps. The settings for flash message is almost same on all Nokia Lumia series phones. Here is the process to deactivate flash message on Nokia Lumia 520 using Idea SIM Card.

Flash Message Solution For Nokia Lumia 520
Go to Settings ---> mobile + SIM
Just below SIM settings
Click on idea
Then Click on SIM Applications
Scroll Down and Select Idea Flash
Click on Activation
Then Click on Deactivate
Click on OK

Deactivate Flash Message on Nokia  Lumia 520 for Idea SIM User
 Check the above image to deactivate flash message on Nokia Lumia 520 for idea SIM users. If you are using any other SIM cards the process is same upto SIM Application then check one by one to deactivate the flash messages. That's all now you will not receive the flash message on the device.

Thursday, February 5, 2015

Manual Internet Settings For Karbonn S2 Titanium Android Smartphone


Here you will know about the manual Internet setting for the Android Smartphone, the below is the example of Karbonn S2 Titanium and Titanium Plus. The complete step by step process of manual Internet Settings APN for the Karbonn S2 Titanium mobile phone. The same process can be follow for all other Android Smartphones, the option may slightly different but the basic GPRS or Internet Settings are same.


Here is the example of Karbonn S2, how to manually do the GPRS/Internet Settings on Karbonn S2?

Karbonn S Titanium Manual Internet Settings
  • Go to settings
  • Then go to More ---> Access Point Names

Manual Internet settings For Karbonn S2 Titanium
  • Select SIM You want to set the GPRS settings
  • Then Press the left soft key and select New APN
  • Now enter the Name i.e. Internet
  • Then set the APN (Access Point Names) as per the operator i.e. for Idea the APN is internet.


Manual Internet settings Karbonn S2 Titanium Plus
  • Now touch the left soft key again and select Save

Manual Internet/GPRS settings for Karbonn S2 Titanium
Then select the new APN or Internet settings 

To know the APN of all leading mobile operators Go here


Saturday, December 20, 2014

Nokia 105 Charging Solution and Charging Ways 100% Working


Nokia 105 charging problem and no charging and no voltage on battery connector see the below solution. Here is the complete charging way  for the 105 Nokia, see the below image for the charging ways.


Nokia 105 Full Charging Way 100% Solved Charging Problem
 

Check the charging track or ways with multimeter, if the connectivity is not good then apply jumper. 

Thursday, December 18, 2014

Moto E Hard Reset and Pattern Unlock Done


How to hard reset Moto E or Motorola XT1022? The below is the process to pattern unlock and hard reset the Moto E and here is the process for Motorola XT1022.

Moto E Android Recovery Menu to hard reset
Moto E Hard Reset
 

  • Switch Off the device
  • Hold Volume Down Key and Just Press the Power Button
  • Press Volume Down Select Recovery and Press Volume Up to OK
  • When see the Android logo press Volume Up and Power Key for Recovery Options
  • Now select wipe data/factory reset and Press power button to OK
or
  • Switch Off the device
  • Hold Volume Down Key and Power Button For Fastboot Mode

Moto E XT1022 Hard Reset and Pattern Unlock Solution with Android Tool
  • Then connect the phone to Computer using USB Cable 
  • Open Android Multi tool
Motorola XT1022 Moto E Fastboot Mode to Hard Reset Using Android Tool

  • Press No. 8 and Hit Enter
  • Now the device will reboot and the hard reset done


Sunday, December 14, 2014

Memory Card Unlock Using Advance Turbo Flasher (ATF) - Micro SD Card Password Removed With ATF


How to unlock MMC or SD card? if you have ATF (Advance Turbo Flasher) then you can easily unlock or remove password of the Memory Card. To remove password you have to buy a MMC Unlock Cable for the ATF and the procedure to remove password for the MMC or SD Card given below.


MMC or SD Card Unlock Using ATF (MMC-SD Card password removed)

Remove Micro SD Card Password With ATF

  • Connect the Box to Computer
  • Open ATF Application (Advance Turbo Flasher)
  • Go to Connection Manager
  • Connect the MMC/SD Card Unlocker to ATF and insert SD Card in it.
  • First Click on Read Card Info (It will show whether the Card is Password Protected or Not)
  • Then If you want to format the card it's easy Just Click on Total Erase Card, this option will erase/format the MMC/SD Card along with the Password but remember your Memory card data will be lost.
  • If you want to recover the password
  • Click on Start/Resume Brute Force
  • It will take some time to find the password for the MMC

Monday, December 8, 2014

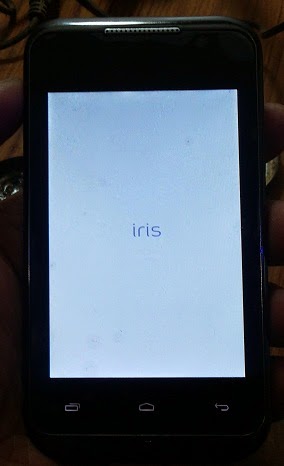
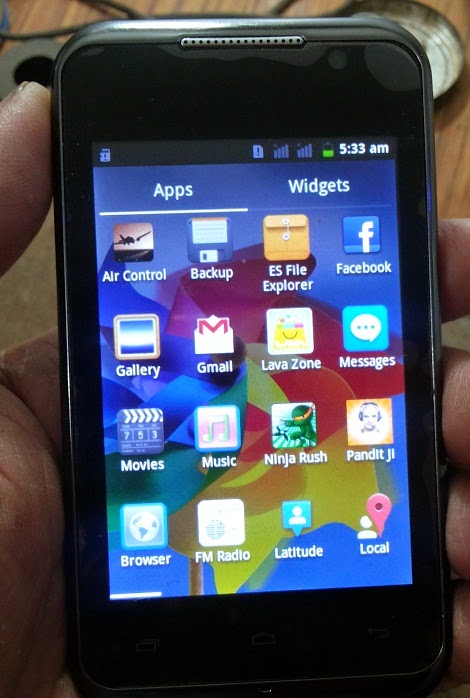
Lava Iris 430 Flash Done With SP Flash Tool


How to flash Lava iris 430 with Smart Phone Flash tool or SP Flash Tool? the below is the way to flash the Lava Android smartphone using SP flash tool. See the below steps to flash the phone  and with flashing the phone you will solve the hang, restart and dead problem of the Lava Iris 430.

Downloads
SP_Flash_Tool_v3.1332.0.187.rar
LAVA_IRIS430_S103_20130108_DCC.rar 


Lava iris 430 Flash success with SP Flash Tool
  • Open Flash tool
  • Click on scatter loading and choose MT6577_Android_scatter_emmc.txt
  • Then click on Download and connect the phone with USB Cable 
  • When you see the Download OK, that means the download process has been completed successfully.


Lava iris 430 flash success with sp flash tool, a complete flash procedure of Lava mobiles
Now disconnect the Lava iris 430 from computer and switch on.

Wednesday, October 8, 2014

Idea GPRS/2G Mobile Prepaid Internet Tariff in Odisha


Idea GPRS/2G prepaid tariff plans valid for Odisha, check the limited and unlimited 2G Internet recharge pack for Odisha. Here is the latest and updated 2G Internet tariff plans for Odisha telecom circle as on October 2014.


Idea GPRS/2G Limited Data Packs for Odisha/Orissa


MRPData BenefitData Validity (Days)OverageMode of Recharge
47240 MB94p/10kbE-Recharge, SIVR 1212, USSD,*800*47#
49250 MB104p/10kbE-Recharge, SIVR 1212
58300 MB124p/10kbE-Recharge, SIVR 1212, USSD*800*58#
98500 MB204p/10kbE-Recharge, SIVR 1212, USSD*800*98#
99500 MB204p/10kbE-Recharge, SIVR 1212
124500 MB304p/10kbE-Recharge, SIVR 1212
128BBM , E-Mail & Internet browsing up to 1GB304p/10kbE-Recharge
148750 MB304p/10kbE-Recharge, SIVR 1212
1551 GB304p/10kbE-Recharge, SIVR 1212

Idea GPRS/2G Unlimited Data Packs for Odisha/Orissa


MRPData BenefitData Validity (Days)OverageFUP limitMode of Recharge
199Unlimited Data30-Speed post 2GB @ 40kbpsE-Recharge, SIVR 1212
249Unlimited Data30-Speed post 3GB @ 10kbpsE-Recharge, SIVR 1212


The above Idea prepaid for Internet balance, choose the plan/tariff and recharge to get the Internet data, these idea Internet offers are valid only in Odisha, if you are belongs to any other circle check the offer in that telecom circle and recharge. For information about the plan and tariff details you can visit the Idea Official Website.

Note:
SIVR = Speaker Independent Voice Recognition
FUP = Fair Usage Policy

In Unlimited Plans after FUP the speed will be 40/10kbps according the tariff
You can recharge some of these 2G data plan by dialing the short code USSD

Sunday, October 5, 2014

All APN (Access Point Name) in One Place For All Leading Mobile Operators


As you know to access internet on you PC, Laptop or Mobile phone, you need to set the APN (Access Point Name). If you are using USB dongle then you can set the APN by going to settings-->Profile Management and on mobile you may get the Internet setting by SMS if not you have to set the GPRS/3G setting manually. So here is some APN (Access Point Name) and Internet Settings for all leading Mobile operators in India.

APN Access Point Name for all Mobile Operators

APN (Access Point Name) List Updated 2014

Idea APN and GPRS/2G/3G Setting

Go to this link and enter the Idea Mobile Number and get the setting on the phone

You can also get the GPRS setting by SMS - SET to 54671

Idea APN – internet/imis
Access Number - *99#

Aircel APN and GPRS/3G Settings
Aircel APN - aircelgprs/aircelinternet
Access Number - *99# or *99***1#


Airtel APN and GPRS/3G Settings
Airtel APN - airtelgprs.com
Access Number - *99# or *99***1#

Tata Docomo APN and GPRS/3G Settings
Tata Docomo APN - TATA.DOCOMO.INTERNET
Access Number - *99# or *99***1#

BSNL APN and GPRS/3G Settings
BSNL APN - bsnlnet
Access Number - *99# or *99***1#

Virgin Mobile APN and GPRS Settings
Virgin Mobile APN - vinternet
Access Number - *99# or *99***1#

Reliance APN and GPRS/3G Settings
Reliance APN - rcomnet/smarinet/rcomwap
Access Number - *99# or *99***1#

Uninor APN and GPRS Settings
Uninor APN - Uninor
Access Number - *99# or *99***1#


Vodafone APN and GPRS/3G Settings
Vodafone APN - www
Access Number - *99# or *99***1#

These are APN settings for data card and mobile phone. Whether it's a Windows phone or Android smartphone try these APN setting as per your Mobile operator and it will work fine. Some times the SMS setting will not reach you due to some technical issue, at that time you need to set the GPRS or 3G Internet settings manually and APN (Access Point Name) must be define, put the APN and access the Internet.

Idea Internet/APN setting for Micromax 3G Dongle

In some Micromax 3G USB dongle the Auto Connect Option will not work on idea SIM card,today I taken one Micromax 3G Dongle (MMX377G 3G USB Manager) and it works fine but when insert idea SIM and trying to Connect it show an error massage (ErrorID=734. The PPP link control protocol was terminated.) in that case you have to do a manual profile setting to access Internet using Idea SIM card, the bellow is the manual setting for Idea on Micromax 3G data card.

  • Open Micromax Dongle Application
  • Go to Settings
  • Click on Profile Management
  • Click on New
  • Profile Name - Idea
  • APN - internet
  • Then Click on Save
  • Go back to Connection and Click on Connect

After set the Idea APN you can either select Auto Connect or Idea connection profile to access Internet.

Saturday, April 26, 2014

LG GT540 Hard Reset - How to Pattern Unlock LG GT540


LG GT540 hard reset and remove pattern lock with keys.


  • First Switched On LG GT540
  • On the Pattern Lock Screen
  • Press Volume Up + Home + Search Button (5 to 10 Seconds)
  • Then Press OK


LG GT540 hard reset and pattern unlock


Thursday, April 24, 2014

Lava iris 349s Hang On Logo Solved By Hard Reset - Wipe Data Factory Reset


Lava iris 349s stuck on logo solved by wiping data or doing a factory reset, Lava iris 349s SPD CPU hard reset and remove pattern lock or wipe data/factory reset. Follow the below steps to Hard Reset your Lava iris 349s.

Lava iris 349s hanged on logo - solved by hard reset


Steps:

  • Press and Hold Volume Down + Power Button Until See Android Recovery Menu (20 to 30 Seconds)
  • Now select Wipe Data/Factory Reset using Volume down
  • Press power button to perform the action


Lava iris 349s hard reset keys - remove pattern lock and do factory reset Lava Mobiles

Search tags: lava iris 349s hard reset, how to remove pattern lock lava iris 349s, Lava mobile hard reset, lava iris 349s factory reset tool, all mobile hard reset method, lava iris 349s wipe data/factory reset.

Wednesday, April 16, 2014

Forme C2+ SPD 6620 Read Flash With Volcano Tool Using Rx and Tx


How to read flash Forme C2+ Color mobile phone using volcano tool with the help of Rx and Tx. In this way you can also flash the Forme C2+ with Volcano Tool.


How to Find Rx and Tx Forme C2+ and Read Flash Volcano Tool

  • Use Universal Jig 
  • Sold 5 Wire to the Universal Jig
  • In Forme C2+ there is no Rx Tx mark only 6 Pins
  • In forme C2+ 2pins are Ground sold any one wire to any one of these 2 pins and sold other 4 wires to other 4 pins
  • Now connect the Box power to the phone


  • Open Volcano tool
  • Go to SPD Tab
  • Select 6610/20 Boot
  • Tick Auto detect Pinouts ( Remember Rx Tx should be selected not USB D+ D-)
  • Select any Task i.e. Read Flash
  • Click Run
Forme C2+ Rx Tx Volcano tool Read Flash

Volcano Tool will automatically find the Rx Tx Pinout and Read the flash file of Forme C2+.


Forme C2+ Log Volcano Tool


Detection initiated, connect the phone and power on it...
  Vcc: 5
  Gnd: 1
  RX: 3, TX: 2
   
  Waiting for phone's response, press the Power on the phone. 
  Internal version: Spreadtrum Boot Block version 2.0
  Boot downloaded.
  Start boot please wait a moment....
  Spreadtrum Boot Block version 1.2
  CPU TYPE:SC6610/20 [66100000]
  FLASH ID: 00C8004000160000
  Flash Type:[GD]  GD25Q32
  Size:0x400000(4MB)
  Reading completed.
  The data has been saved in C:\Users\xxxx\Desktop\Forme C2+\MOCOR_09A_MP.W11.16_P2_Release_20140415_115306_FullFlash.bin, size: 4 M.

Wednesday, April 9, 2014

Micromax A74 Hard Reset and Remove Pattern Lock


How to hard reset Micromax A74 with keys, the below is the way how you can factory reset the Micromax A74.


Steps:

  • Press and Hold Volume Up + Power Key until see Android Logo
  • Then Press Power Key again to see recovery option
  • Now press volume Down to select the task
  • Then press Volume Up or Power button to Enter


Micromax A74 Hard Reset

or 

You can Try Second Method


Sunday, March 23, 2014

Micromax X263 MTK 6252 CPU Set Pinouts Volcano Tool - www.FreeComputerTricks.in


Here is the way how you can format Micromax X263 MTK CPU 6525 using Volcano Tool, So to do a Format you have to set the pin-outs manually and then you can able to format the Micromax Mobile phone with Volcano Tool V2.5.5.

Important : Before format first back up the flash file from the phone (Read Flash) It is always safe, because if your phone is dead after format then you can easily flash the phone with the back up file.


Micromax X263 MTK - 6252 Set pinouts Volcano Tool

Micromax X263 6252 CPU set pinouts done with volcano tool

  • After Pinout Setting Complete
  • Go to MTK Tab
  • Click on Format or choose any action
  • Uncheck Auto Detect Pinouts
  • Then Click on RUN

Thursday, March 6, 2014

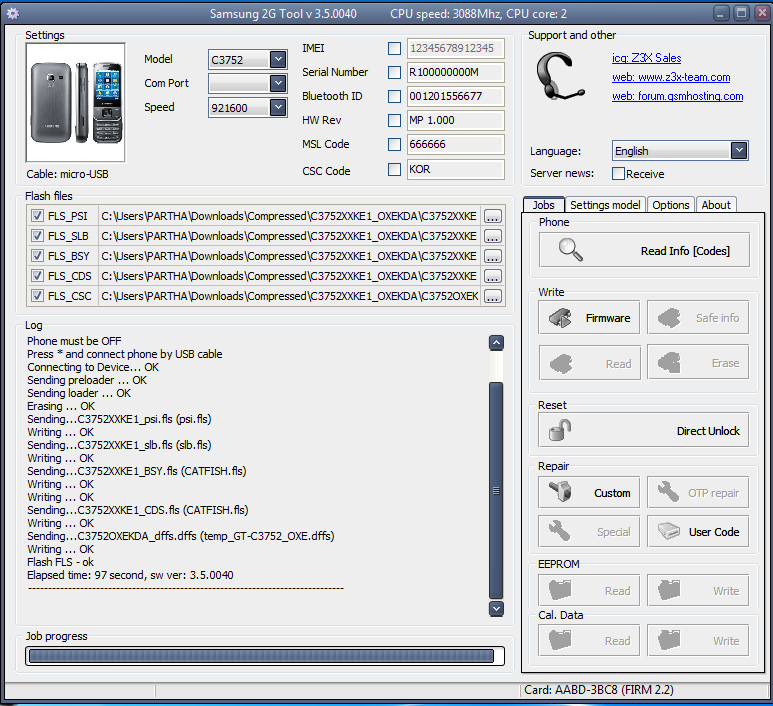
Samsung C3752 Flash Done With Z3X - How To Flash C3752 With Z3X, Samsung 2G Tool


Samsung c3752 flash done with z3x box, Samsung 2G Tool. Here is the process how to flash c3752 with z3x box.

  • Open Samsung 2G Tool
  • Select the Model C3752
  • Select the Flash Files i.e. PSI, SLB, BSY,CDS and CSC
  • Then Just connect the Micro USB Cable to Samsung C3752


Samsung C3752 Flashing with Z3X Box using Samsung 2G Tool v3.5.0040

That's wait for sometime to finish the flash process and you have successfully flash the Samsung C3752 phone with Z2X.

📚 You May Also Like to Read